
Insights
Step-by-Step: How to Set Up Google Analytics 4 (GA4)
Learn how to do the basic GA4 setup on your nonprofit organization’s website.

I always say, “Your website is a tool, designed to help users do something.” That’s our first principle of what makes an effective website. In order to learn how well our tool is performing, how successful it is, whether it’s working properly, we have the wonderful gift of analytics.
In this article we’ll show you step-by-step how to set up a GA4 tag for your website by yourself. I’ll start by walking you through creating a GA4 property, show you how to configure it, and then how to install the GA4 tag.
And along the way, we’ll learn interesting things about the newest version of Google Analytics and how you can make the best use of it.
-
Step 1. Create a GA4 property
-
Step 2. Configure your GA4 property
- Stream details
- Google tag
- Data collection
- Data retention
- Data filters
- Account settings
- Property settings
-
Step 3. Install your GA4 tag
In order to do this implementation, you’ll need a Google Tag Manager (GTM) container on your website. You can add one pretty simply with the Google Site Kit WordPress plugin (this plugin gives you the option to add a GA4 tag as well, however we don’t recommend this doing it this way as we prefer controlling it through GTM).
Step 1. Create a GA4 property
Start by navigating to Google Analytics: analytics.google.com. If you have an existing account, sign in. If not, follow the steps to create a free account.
Follow these steps:
-
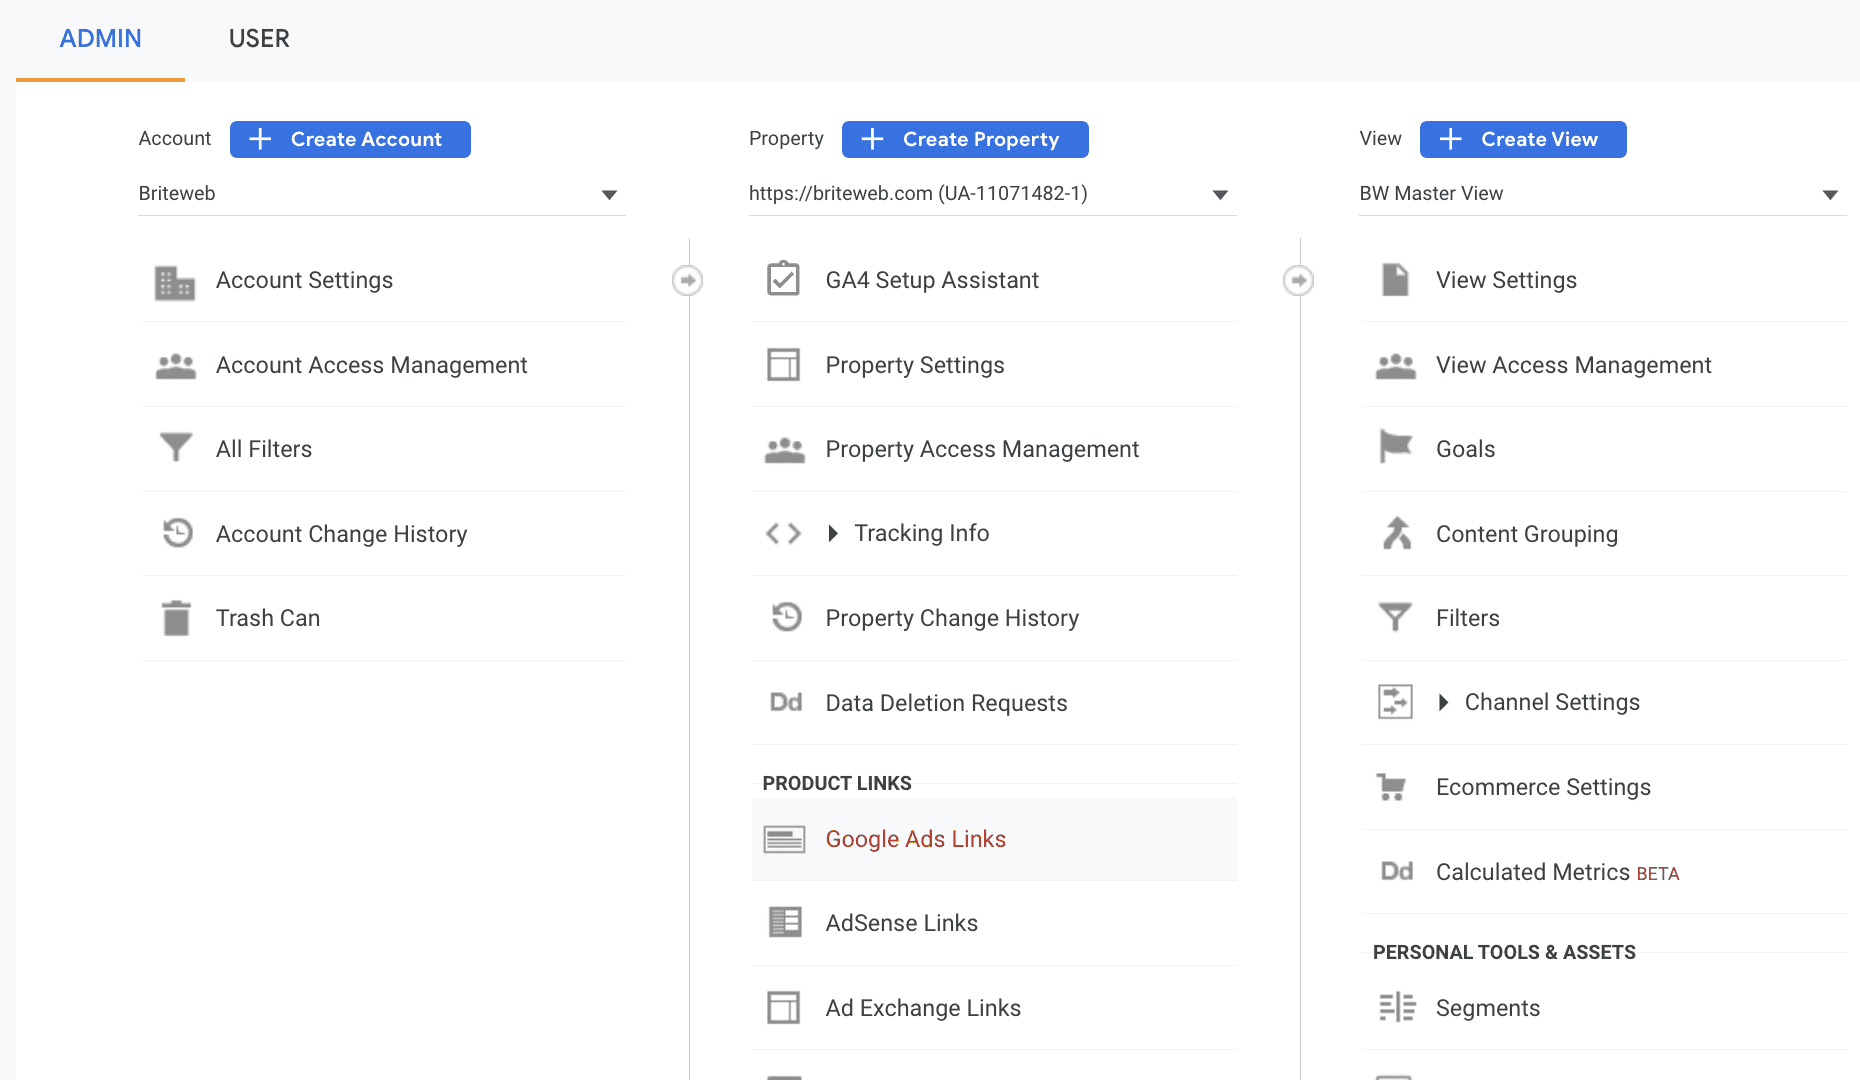
1
In the middle column, click Create Property. This will take you to the GA4 property creation.
-
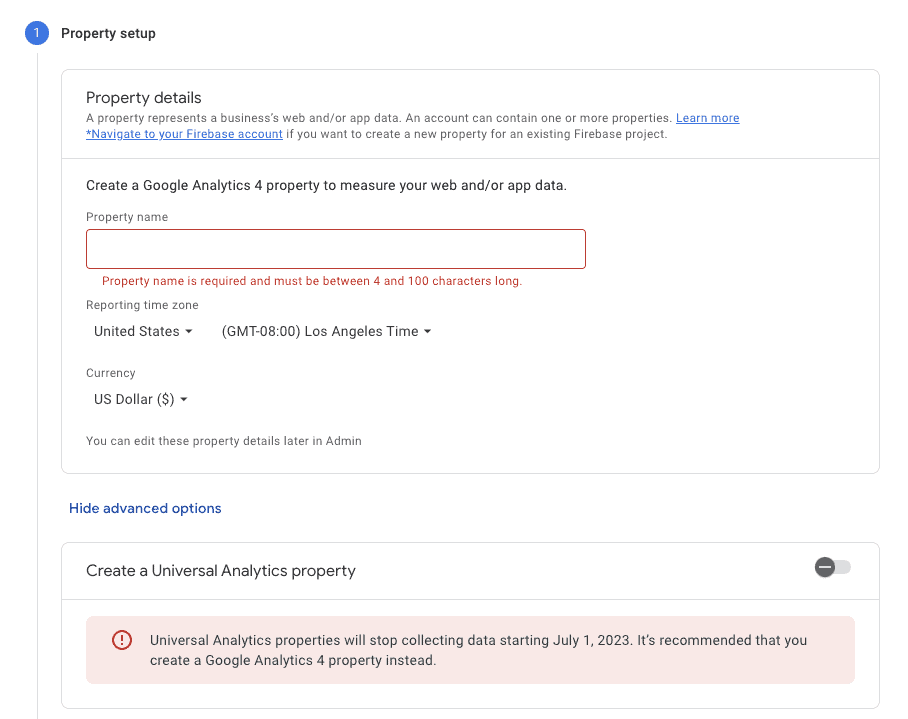
2
Name your property — I like to use {{Organization Name}} GA4 — and select the right reporting zone and currency.
-
3
You’ll see a screen with business information, you don’t have to give any information, just click Create Property.
Next, Google will give you a dialogue box to migrate from Universal Analytics (UA). If you have an existing account where you’re tracking custom events, conversions and dimensions, you might be tempted to select “Yes”.
I don’t recommend you do that: GA4 and UA have completely different ways of gathering and displaying data. Migrating your UA set-up might seem like an efficient use of time, but what it will really do is give you messy data.
- Select No
At this point, your property will be set up and you’ll be taken to the configuration screens.
Step 2. Configure your GA4 property
-
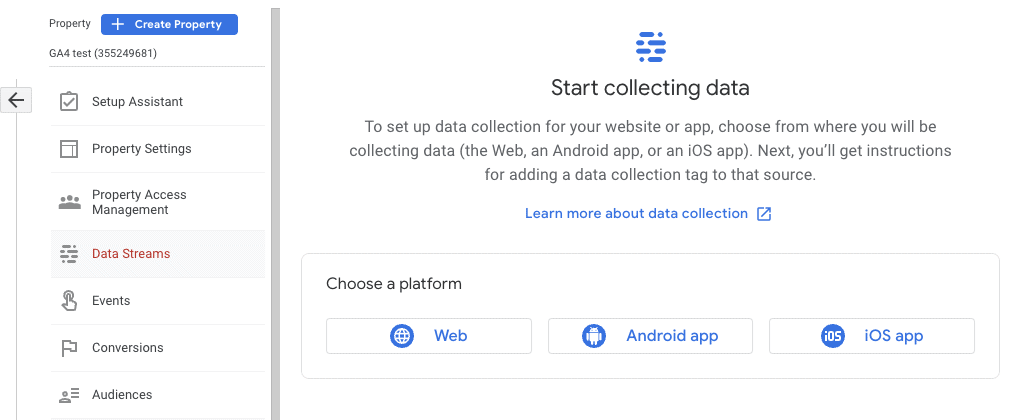
1
On the Data Streams screen select Web.
-
2
Enter the URL for the main website you’re tracking and give it a name. Again, we usually use something like {{Organization Name}} website.
-
3
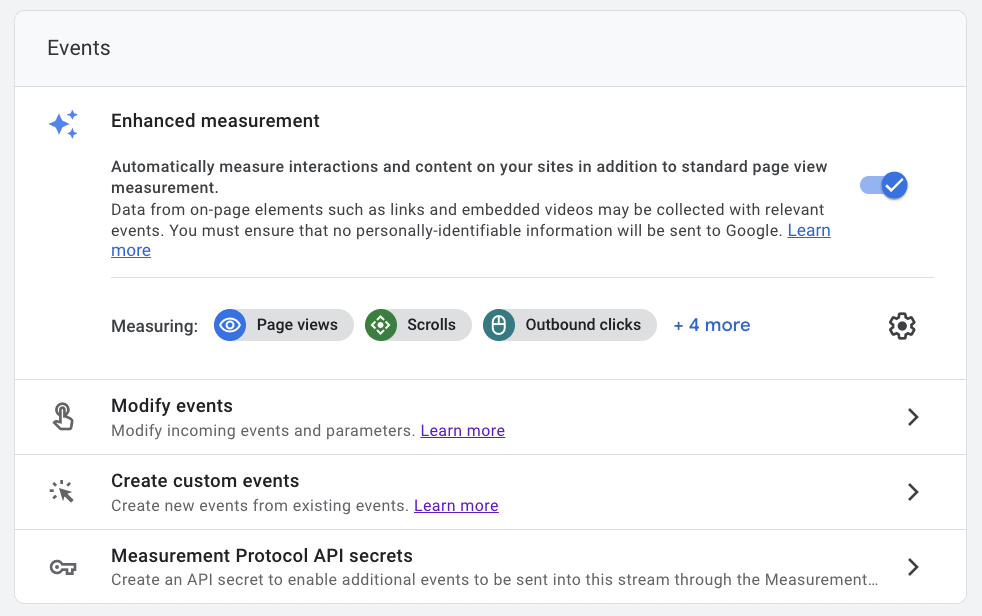
Leave the Enhanced Measurement toggle on.
Out of the box, GA4 will measure:
- Page views
- Scrolls to 90% of the page
- Clicks to external sites
- Internal searches (as long as search results are displayed on a page with a parameter of ?s=
- Video views on embedded YouTube videos
- File downloads
- Form interactions
- This isn’t the limit of what GA4 can track, just what comes with the basic implementation.
You’ll then see a screen that will include:
- Stream details
- Events
- Google tag
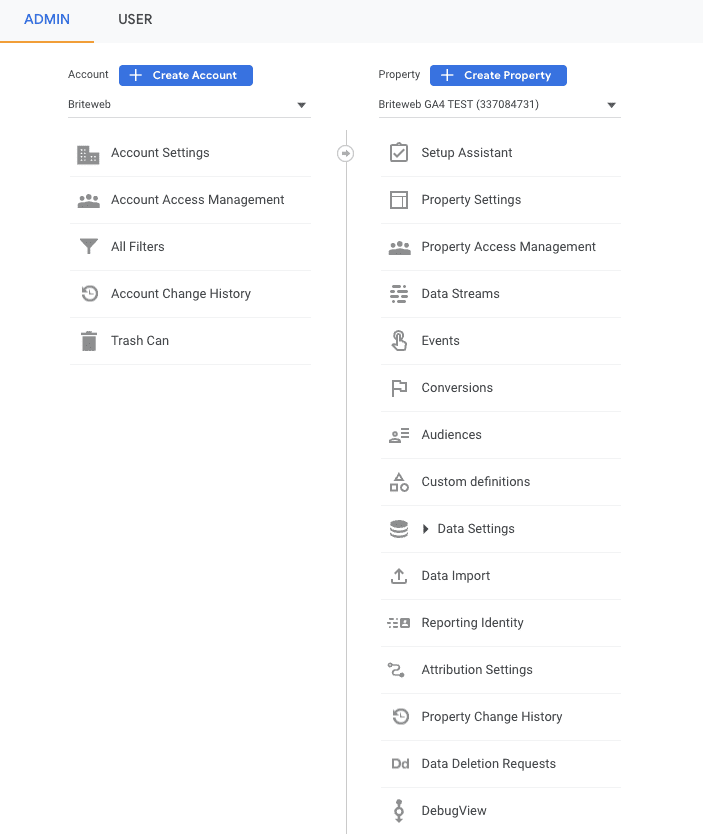
You can always get back to this screen by navigating to Admin and clicking Data Streams in the Property column.
Stream details
Here, you’ll find information about the GA4 property—or stream—you’ve created, including your measurement ID.
You can copy that now for when we want to install the tag, but first we’ll give you a little tour to continue the basic configuration.

Google tag
In this section, you’ll be able to define certain parameters of your GA4 tag.
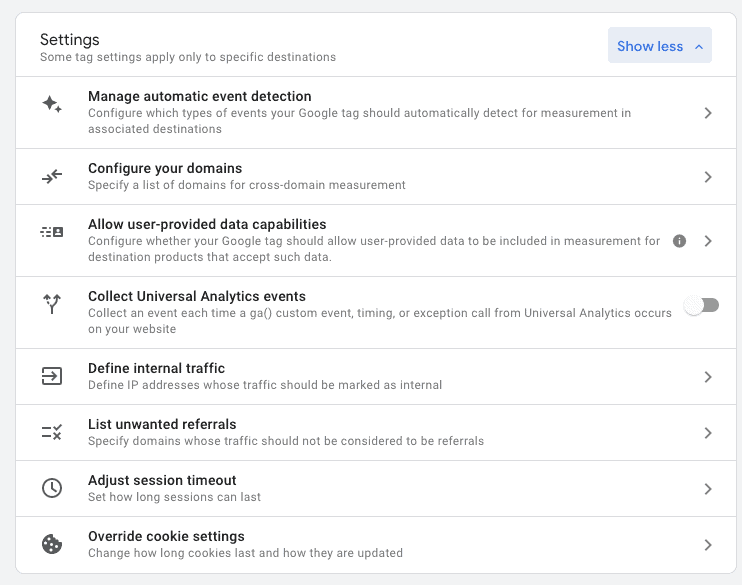
Configure your domains – if your web experience extends over different domains, you can add additional domains. Note that GA4 does not consider a subdomain (e.g. donate.maindomain.com) to be a different domain. Also note you’ll need to be able to add the tag to the additional domains.
Collect Universal Analytics events – just like when you first set up your property, Google gives you the option to track existing events you might have set up in your UA property. Again, we don’t recommend you touch this option.
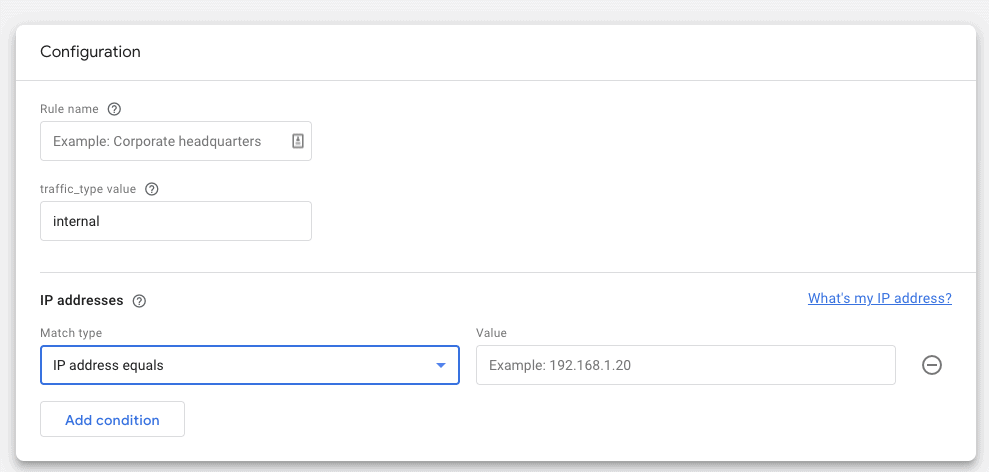
Define internal traffic – Add IP addresses for your offices or staff homes who frequently visit your website to make sure they don’t colour your analytics too much. Under the match type, you can change it to IP address contains.
List unwarranted referrals – when you have an experience that goes across different domains that you might not be able to track, you’ll want to exclude these sessions from your list of referrals (e.g. payment confirmation, forms, etc.).
Check your UA account to see if you’ve already done this work and just copy it over. If you haven’t set them up, go to your UA reports > Acquisitions. Click on Referrals to pull a list of the domains you’ve gotten referral traffic from in the past year.
You shouldn’t have to touch any of the other settings.
Data collection
In the Admin panel, in the Property column, select Data Settings. Choose Data Collection. Here, you’ll have the option to turn on Google Signals. Google Signals associates visits to your site with users logged into Google, which will give you insights on gender, age as well as interests.
If you turn on Google Signals, we highly recommend that you connect with your legal department or legal advisors to make sure your website’s Privacy Policy properly reflects this information. We also recommend you implement proper cookie banners to collect user consent. Learn more in our blog post on consentful design.
Data retention
In the Admin panel, in the Property column, select Data Settings. Choose Data retention and select whether you would like to retain data for 2 months or 14 months.
You’ll be able to see historic data from the moment you install your GA4 tag. What data retention affects is more customized reports in the Explore section.
We recommend setting your retention to 14 months unless you have a reason to set it to only 2 months.
Data filters
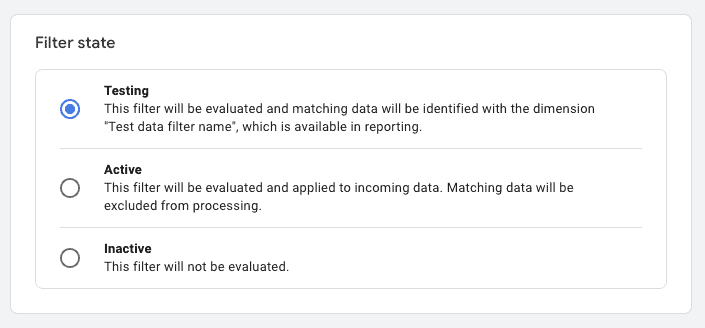
In the Admin panel, in the Property column, select Data Settings. Choose Data Filters. If you’ve followed instructions so far, you’ve defined your internal traffic, but you haven’t excluded it yet.
By default, GA4 gives you the ability to keep your internal traffic but add a filter of Testing. This can be useful if you want to compare your traffic with or without internal hits. But if you just want to exclude it, change the filter to Active.
Step 3. Install your GA4 tag
-
1
If you’ve copied the Measurement ID and it’s still on your clipboard, great. If not, go to Admin > Property > Data Streams and click on your stream.
-
2
Go to Google Tag Manager (GTM). Select your container and on the main screen, click on New Tag.
-
3
A new screen will slide in from the right. At the top, type in GA4 configuration {{Measurement ID}}
-
4
Click in Tag Configuration and select Google Analytics: GA4 Configuration from the list of available tags.
-
5
In the Measurement ID form field, paste in your GA4 measurement ID, then click in the Triggering section and choose All pages from the list.
-
6
Click the big blue Save button in the top right corner.
-
7
Now back on the main screen, instead of clicking Submit, choose Preview. We’re just going to make sure there are no issues with our setup. Enter your homepage address in the popup and click Connect.
-
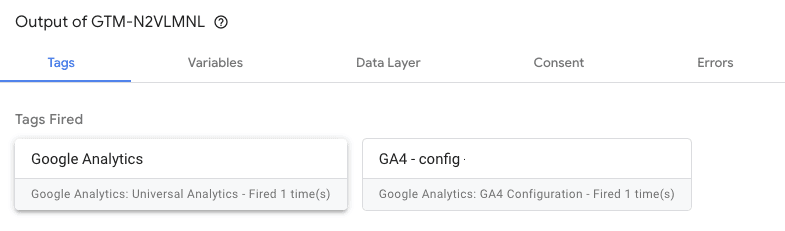
8
GTM will launch your homepage, click back to the GTM Preview screen and confirm that the GA4 tag has fired.
-
9
Return to your container screen and hit Publish. You’ll now have your GA4 tag set up on your website.
You're Now Set Up
GA4 is the future of Google Analytics. If you start using it now you can run it in parallel with Universal Analytics and begin collecting historical data before the changeover in July.
As GA4 and UA capture analytics differently it gives us an opportunity to look for discrepancies between the two data sources over time, such as number of users, sessions and pageviews. It can also be an opportunity to re-evaluate what you are currently measuring and adjust GA4 KPI’s accordingly.
There’s still a lot to learn, but with this basic implementation, you’ll be able to get a feel for the platform and prepare your team for the transition.
If you have any questions or need further help contact your Project Manager or reach out to us.